Contents
Introduction
Repotting your plants is like giving them a fresh start and more room to grow, but it’s crucial to do it the right way. Why? Because getting it wrong can stress out your plant, damage its roots, and even stunt its growth. So, let’s dive into why repotting is essential and how to do it without causing your plant any harm.
When plants grow, their roots need more space to stretch out and explore. If they stay in the same pot too long, they can get “root bound,” which means their roots start circling around the pot and can even break through the drainage holes. This can lead to poor plant health because the roots can’t absorb water and nutrients properly. That’s where repotting comes in—it’s all about giving your plant a bigger home to thrive in.
But here’s the catch: repotting isn’t as simple as just moving the plant to a new pot. If you’re not careful, you could end up causing more harm than good. Plants are sensitive, and their roots are crucial for their overall health. If you’re too rough or make mistakes during the process, you might shock your plant or damage its roots. This can lead to problems like wilting, yellowing leaves, or slow growth.
In this guide, we’re going to walk you through the steps to repot your plants the right way. We’ll cover everything from picking the perfect pot to handling the roots with care. By the end, you’ll know how to give your plant a new home without putting its health at risk. Ready to keep your green friends happy and healthy? Let’s get started!
Choosing the Right Time to Repot
Picking the right time to repot your plants is like choosing the perfect moment to move houses. It’s all about making sure your plant is in the best shape to handle the change. So, how do you know when it’s time to repot?
First off, keep an eye on your plant for signs that it’s outgrown its current pot. Some clues are pretty obvious, like roots poking through the bottom of the pot or the plant starting to look a bit cramped. You might notice that the plant is growing slowly or that water isn’t soaking in as well as it used to. These are all signs that your plant could use a bit more space to stretch out.
Timing is also key. The best time to repot most plants is during their active growing season, which is usually in the spring or early summer. During this time, plants are naturally more resilient and better equipped to handle the stress of moving. Think of it like spring cleaning for your plant—it’s the perfect time for a fresh start.
If you repot during the winter, when most plants are in a bit of a growth lull, they might struggle to adjust to their new home. So, unless your plant is really in dire need, it’s best to wait until the warmer months when it’s ready to bounce back.
In summary, watch for signs that your plant is ready for a new pot and aim to repot when your plant is actively growing. This way, you’ll help ensure that your plant settles into its new home with minimal stress and starts thriving in its upgraded space.
Selecting the Appropriate Pot
Choosing the right pot for your plant is like picking out the perfect new home. You want something that gives your plant enough room to grow and keeps it comfortable. Here’s how to find that ideal pot.

First, consider the size. When picking a new pot, go for one that’s just a size or two larger than the current one. If you choose a pot that’s too big, it can actually be more harmful than helpful. Too much extra space can lead to waterlogging and root rot because the soil stays too wet for too long. A pot that’s a bit larger allows your plant to grow and develop without overwhelming it.
Next up, think about the material of the pot. Pots come in various materials like terracotta, plastic, or ceramic, and each has its pros and cons. Terracotta pots are great because they’re porous, which means they allow moisture to evaporate and help prevent root rot. Plastic pots are lightweight and often come with built-in drainage, but they don’t breathe as well as terracotta. Ceramic pots are stylish but can be heavy and also need proper drainage.
Speaking of drainage, this is super important. Your new pot should have drainage holes at the bottom to allow excess water to escape. Without good drainage, water can pool at the bottom of the pot, leading to soggy soil and potential root problems. If you fall in love with a pot that doesn’t have drainage holes, you can always drill a few yourself or use it as a decorative cover pot with a plastic liner that has drainage.
In short, pick a pot that’s slightly larger than the old one, choose a material that suits your plant’s needs, and make sure it has proper drainage. This way, your plant will have the perfect new home to grow and flourish.
Preparing Your Plant for Repotting
Getting your plant ready for repotting is like prepping for a big move. You want to make sure everything goes smoothly and your plant is set up for a successful transition. Here’s how to get your plant in top shape before you start the repotting process.

Start by giving your plant a good watering a day before you plan to repot it. This helps the soil stay together and makes it easier to work with. Well-watered soil is less likely to crumble and disturb the roots too much, reducing stress for your plant. It’s a bit like making sure everything is packed and ready to go before you actually move.
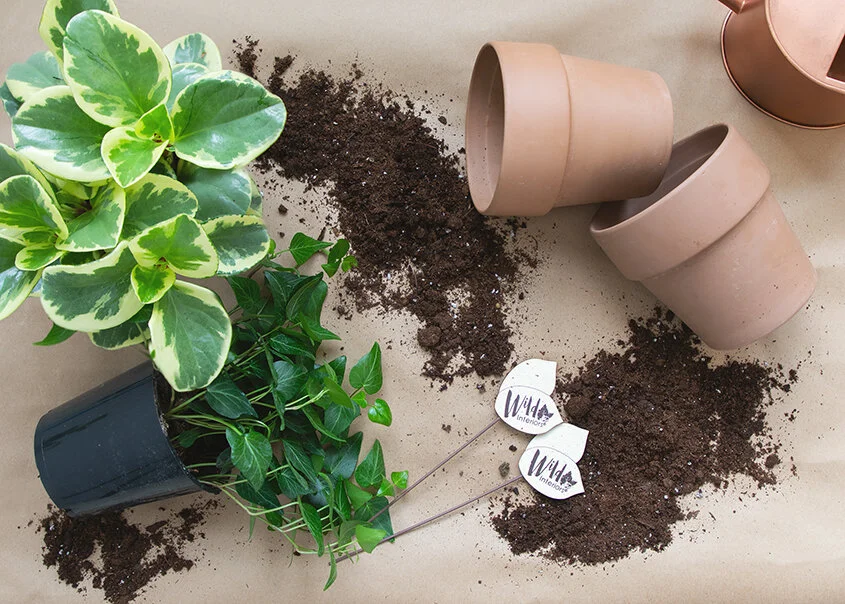
Next, gather your tools. You don’t need anything fancy, just the basics: gloves to keep your hands clean, a small trowel or hand shovel to scoop out soil, and a watering can to keep things moist. Having these tools on hand will make the whole process smoother and help you avoid any unnecessary mess.
Before you start digging, take a moment to inspect your plant. Look for any obvious signs of stress or issues like damaged leaves or pests. Address these problems first to ensure your plant is in good shape for its move.
In essence, preparing your plant for repotting means giving it a little TLC with proper watering, having your tools ready, and checking for any issues. With these steps, you’ll set your plant up for a successful transition to its new pot and help it settle in more comfortably.
Removing the Plant from Its Current Pot
Taking your plant out of its current pot is a bit like carefully lifting a heavy piece of furniture. You want to do it gently to avoid any damage. Here’s how to remove your plant without causing a mess or harming its roots.
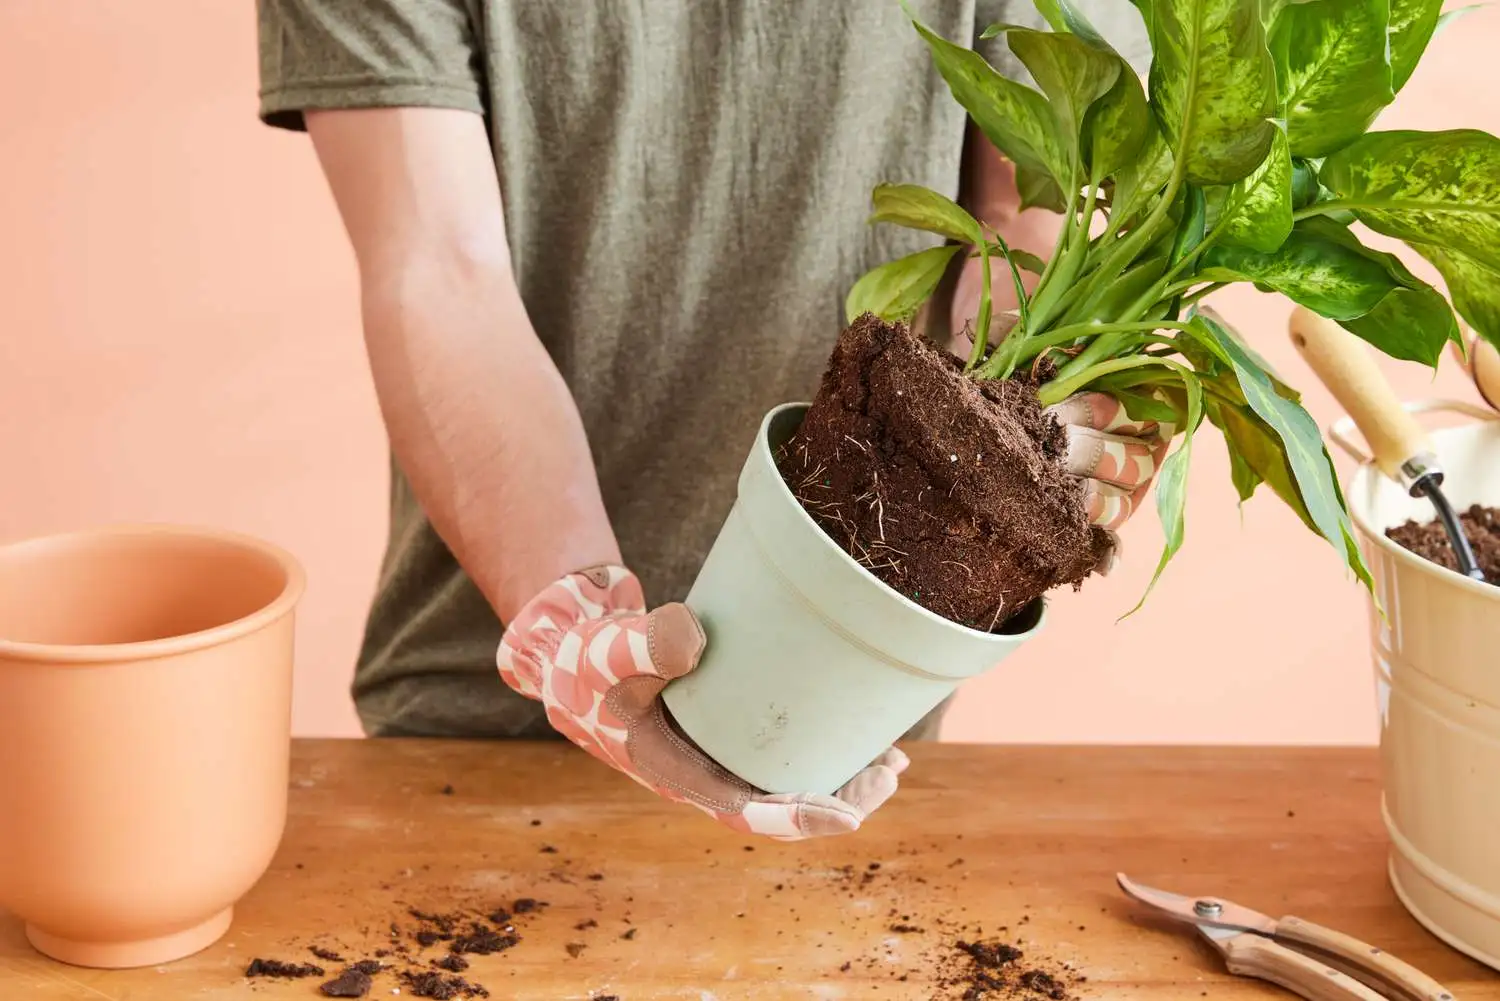
Start by gently tipping the pot sideways or upside down. Support the base of the plant with one hand and tap the sides of the pot with the other hand. This can help loosen the soil and make it easier to slide the plant out. If the plant doesn’t come out right away, don’t force it—just tap and wiggle gently.
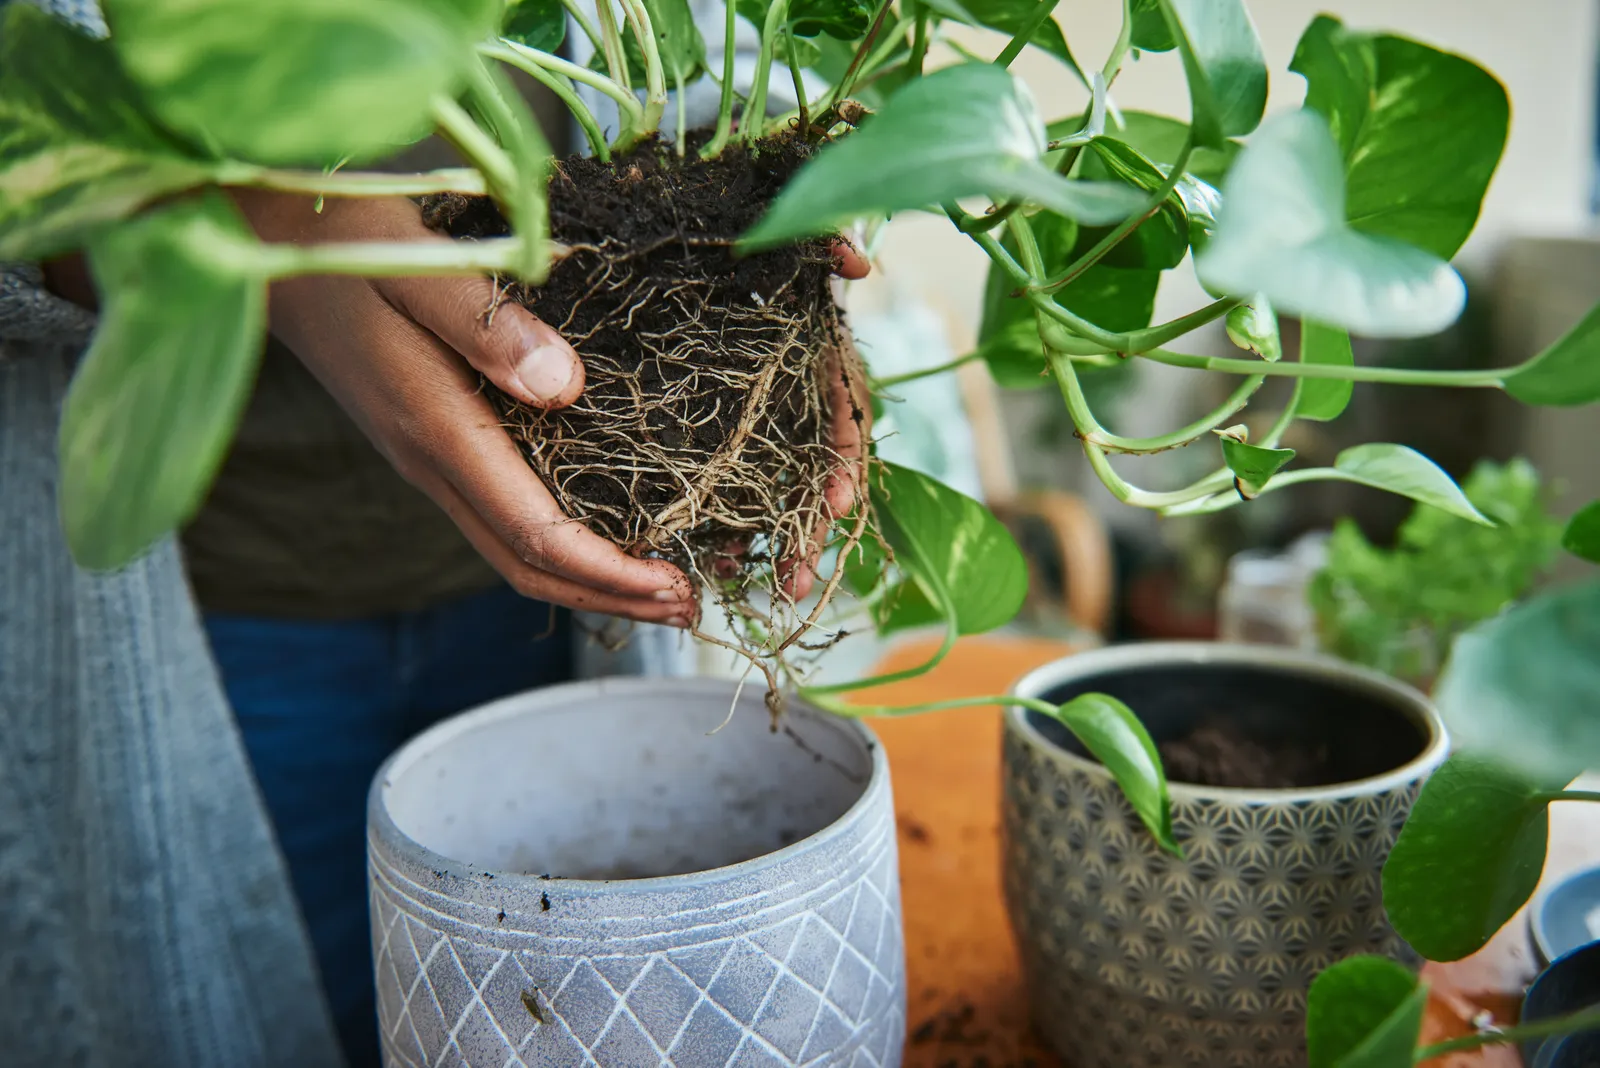
If your plant is root bound, meaning its roots have started circling the pot, you’ll need to handle it a bit differently. Carefully pull the plant out and gently tease the roots apart. Avoid ripping or tearing them, as this can stress the plant. If the roots are really tangled or growing through the drainage holes, you may need to use a clean, sharp knife or scissors to trim away any excess roots.
For larger plants or those with delicate roots, you might need a bit more help. Use a trowel or a flat tool to carefully loosen the soil around the edges of the pot. This can make it easier to slide the plant out without damaging the roots.
In summary, removing your plant from its pot involves gently loosening the soil, handling root-bound plants with care, and using the right tools to make the process smooth. By taking these steps, you’ll help ensure that your plant transitions to its new home without unnecessary stress or damage.
Inspecting and Preparing the Roots
Once your plant is out of its old pot, it’s time to give the roots some attention. This step is crucial because healthy roots are key to a thriving plant. Here’s how to inspect and prepare the roots for their new home.
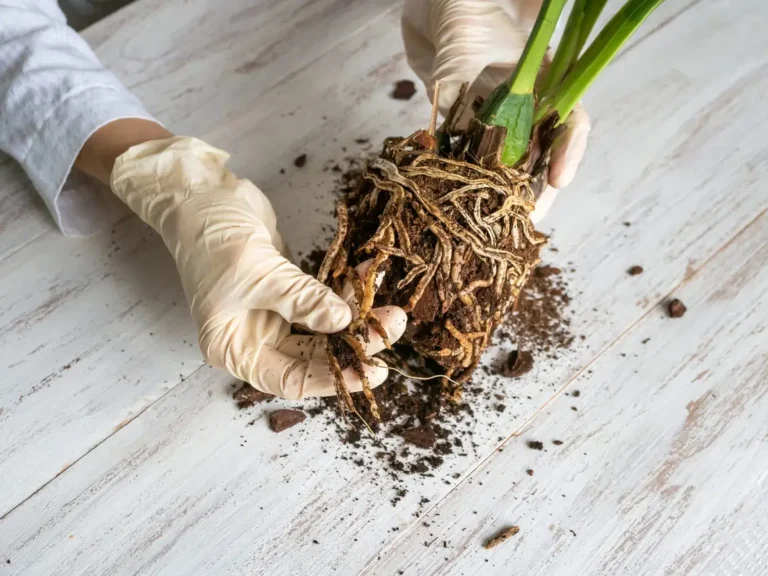
First, take a close look at the roots. Healthy roots should be white or light-colored and firm. If you spot any dark, mushy, or rotten roots, it’s important to trim them away. Use clean, sharp scissors or pruning shears to carefully cut away any damaged or dead roots. This helps prevent rot and disease from spreading and gives your plant a fresh start in its new pot.
Next, gently loosen any tangled or compacted roots. If you see roots that are circling around the root ball, gently tease them apart with your fingers. Be careful not to break them, as roots that are too damaged might struggle to grow properly. For particularly stubborn roots, you can use a fork or a small tool to help separate them.
In some cases, you might need to trim the root ball a bit to fit the new pot better. If the roots are extremely dense or long, you can cut back some of the root mass. Just be sure to leave enough roots so the plant can still absorb water and nutrients effectively.
In summary, inspecting and preparing the roots involves checking for damage, trimming any unhealthy roots, loosening tangled roots, and making adjustments as needed. By taking these steps, you’ll set your plant up for a smooth transition and help it thrive in its new pot.
Repotting the Plant
Now that everything is ready, it’s time to repot your plant. This is the moment when all your preparation pays off, and you move your plant into its new home. Here’s a step-by-step guide to make this process as smooth as possible.

Start by placing the plant in the center of the new pot. You want to make sure that the plant sits at the same depth it was in the old pot. The top of the root ball should be level with the top edge of the new pot, not buried too deep or sitting too high. This helps ensure that the plant’s roots are properly positioned for healthy growth.
Once the plant is in position, begin filling the pot with soil around the root ball. Add soil gradually, and gently press it down with your fingers or a small tool to eliminate air pockets. Be careful not to pack the soil too tightly, as roots need some space to grow and absorb water. The goal is to have the soil snug but not compacted.
After filling the pot, give it a gentle shake or tap it on the table to settle the soil and ensure there are no large air gaps. If needed, add a bit more soil to bring the level up to the top of the pot, leaving a small space at the edge for watering.
Water the plant thoroughly after repotting to help settle the soil around the roots and reduce transplant shock. Water until you see it draining out of the bottom of the pot. This initial watering also helps the plant adjust to its new environment and ensures the soil is evenly moist.
In summary, repotting your plant involves positioning it correctly in the new pot, filling it with soil while avoiding compaction, settling the soil, and giving it a good watering. These steps help your plant transition smoothly to its new home and set it up for healthy growth.
Post-Repotting Care
After repotting your plant, it’s essential to give it some extra care to help it settle into its new home and recover from the move. Here’s how to take care of your plant in the days and weeks following repotting.
Start by watering your plant appropriately. After repotting, it’s important to keep the soil evenly moist but not waterlogged. Water your plant as needed, checking the top inch of soil to see if it feels dry. Avoid letting the plant sit in standing water, which can lead to root rot.
Next, find the right spot for your plant. Place it in a location with appropriate light conditions based on its needs. Avoid direct sunlight right after repotting, as this can stress the plant further. Instead, give it bright, indirect light to help it adjust without being overwhelmed.
Monitor your plant closely for signs of stress. It’s normal for plants to experience some shock after repotting, so keep an eye out for symptoms like wilting, yellowing leaves, or slow growth. If you notice any issues, make sure you’re not over or under-watering and that the plant is in suitable light conditions.
It’s also a good idea to avoid fertilizing your plant immediately after repotting. Wait a few weeks before applying any fertilizer, as the fresh soil will provide initial nutrients, and adding fertilizer too soon can stress the plant.
In summary, post-repotting care involves proper watering, choosing the right light conditions, monitoring the plant for signs of stress, and delaying fertilization. By taking these steps, you’ll help your plant adjust smoothly to its new pot and support its continued growth and health.
Troubleshooting Common Issues
Even with the best preparation, sometimes plants can still experience problems after repotting. Here’s how to troubleshoot some common issues you might encounter and get your plant back on track.
If you notice yellowing leaves, it could be a sign of overwatering or poor drainage. Check if the soil is soggy or if water is pooling at the bottom of the pot. Make sure the new pot has adequate drainage holes and that you’re not watering too frequently. Allow the soil to dry out a bit before watering again to help prevent root rot.
Wilting can occur for a few reasons. If the plant looks droopy, it might be underwatered, or the roots could be stressed from repotting. Ensure you’re watering the plant properly and that the soil is moist but not waterlogged. On the other hand, wilting can also be caused by overwatering. Check the soil moisture and adjust your watering routine accordingly.
Slow growth after repotting is common as plants need time to adjust to their new environment. If your plant isn’t growing as quickly as usual, give it some time. Ensure it’s getting the right amount of light and isn’t experiencing any other stress factors. If growth remains sluggish, check for root health issues or nutrient deficiencies.
In summary, troubleshooting post-repotting issues involves checking for overwatering or poor drainage, adjusting watering practices, and ensuring the plant has the right conditions for growth. By addressing these common problems, you’ll help your plant recover and thrive in its new pot.
Conclusion
Repotting your plants can seem like a daunting task, but with the right approach, it’s a rewarding way to support their growth and health. By now, you’ve learned how to choose the perfect time to repot, select the right pot, prepare both your plant and its new home, and handle common issues that might arise.
To recap, the key to successful repotting starts with recognizing when your plant needs more space and choosing a pot that’s just the right size. Preparing the plant and soil properly, removing the plant gently, and inspecting and caring for the roots are crucial steps in ensuring a smooth transition.
Once your plant is in its new pot, proper post-repotting care is essential. Regular watering, choosing the right spot, and monitoring your plant for stress will help it settle into its new environment. And if you encounter any issues, knowing how to troubleshoot common problems can make all the difference.
Repotting isn’t just about changing the pot; it’s about giving your plant a better chance to thrive and grow. By following these steps, you’re not only helping your plant adjust to its new home but also setting it up for continued health and success.
So, go ahead and give your plants the fresh start they deserve. With a bit of care and attention, they’ll reward you with lush, vibrant growth and bring even more life to your space. Happy repotting!


