Contents
Introduction
Have you ever dreamed of turning a boring wall into a lush, green masterpiece? Well, a vertical plant wall might just be your new best friend! Imagine walking into a room and being greeted by a stunning wall covered in vibrant plants—sounds amazing, right?
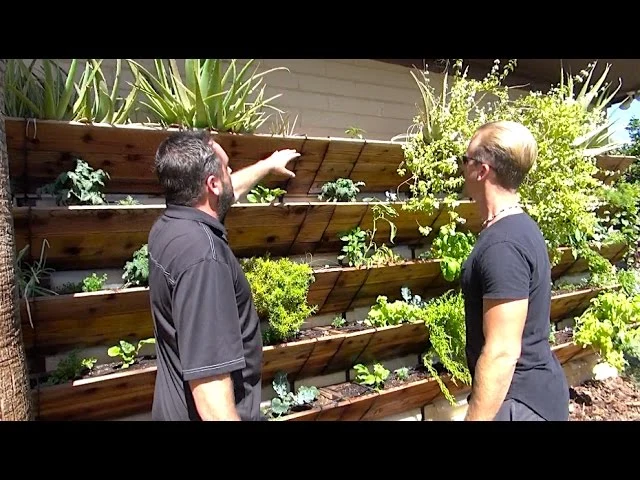
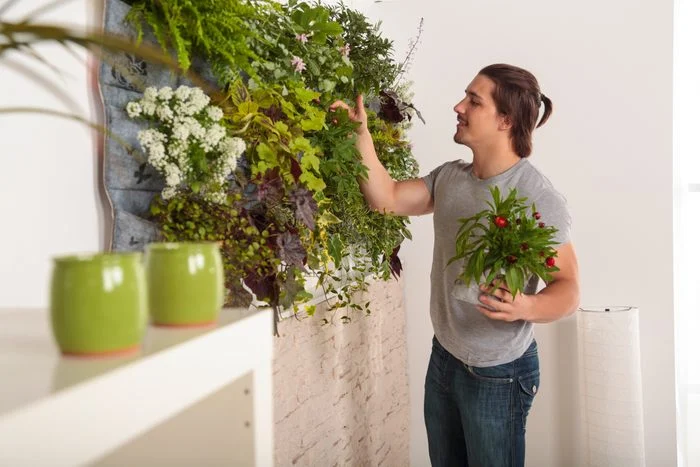
So, what exactly is a vertical plant wall? It’s basically a living wall where plants are grown on a vertical surface, instead of the usual horizontal garden beds or pots. Think of it as a garden that grows upwards rather than outwards. These plant walls can be installed indoors or outdoors, transforming any empty wall into a lush, green oasis.
Why Go Vertical?
There are plenty of reasons why a vertical plant wall is a fantastic idea. First off, they’re incredibly eye-catching. A well-designed plant wall can become the focal point of any room or garden, adding a touch of natural beauty and a splash of color to your space.
But it’s not just about looks. Vertical plant walls also save space, making them perfect for small apartments or homes where floor space is limited. Plus, they can help improve air quality by filtering out pollutants and producing oxygen, which is a huge bonus for your health and well-being.
What to Expect from This Guide
Building your own vertical plant wall might sound like a big project, but don’t worry—it’s easier than you might think! In this step-by-step guide, we’ll walk you through everything you need to know to create your own green wall. We’ll cover planning, picking the right plants, gathering materials, and putting everything together.
By the end, you’ll have all the tips and tricks you need to make your vertical plant wall thrive, and you’ll be able to enjoy your beautiful new addition to your home or garden.
Ready to turn that empty wall into a green paradise? Let’s dive in and get started!
Planning Your Vertical Plant Wall
Alright, so you’re excited about creating your vertical plant wall—awesome! Before we dive into the nitty-gritty of building, let’s talk about planning. A bit of prep work can make a huge difference in how your plant wall turns out. Here’s what you need to think about to get started.

Assessing the Space
First things first: take a good look at the wall you want to transform. How big is it? You’ll need to measure the dimensions of the wall to figure out how much space you’ve got for your plant wall. Make sure to measure both the width and height, as well as the depth if you’re going for a more 3D setup.
Next, think about the light conditions. Is your wall bathed in sunlight, or does it get only a little light? The amount of light your plants get will impact their growth and health. If you’re planning to install the wall indoors, you might want to consider using grow lights to give your plants the boost they need.
Also, consider the climate. If your wall is going outside, you’ll need to pick plants that can handle your local weather conditions. Hot, cold, or somewhere in between—there are plants out there that can handle it!
Choosing the Right Plants
Now that you know your space and light conditions, it’s time to pick your plants. The key is to choose plants that will thrive in your specific environment. If you’re new to gardening, don’t worry—there are plenty of low-maintenance options out there.
For indoor walls, consider plants like ferns, pothos, or succulents. These are hardy and can tolerate lower light conditions. For outdoor walls, you might go for something like ivy, herbs, or flowering plants, depending on your climate.
Also, think about how you want your plant wall to look. Do you want a mix of textures and colors, or are you aiming for a more uniform look? Picking a variety of plants with different shapes and colors can create a visually stunning wall.
Designing Your Layout
With your space and plants in mind, it’s time to sketch out your design. You don’t have to be an artist—just a simple sketch to visualize how you want your plants arranged. Consider the height of each plant and how they’ll fit together. You might want to place taller plants at the bottom and shorter ones at the top, or mix them up for a more dynamic look.
Think about the design style that suits your space. Are you into a neat, symmetrical arrangement, or do you prefer something a bit more random and eclectic? Your design style will help guide your plant choices and how you arrange them on your wall.
Wrapping It Up
So, to sum it up: measure your wall, check the light, choose plants that fit your conditions, and sketch out your design. Planning might seem like a lot, but it’s the foundation for creating a beautiful and thriving vertical plant wall. Once you’ve got this sorted, you’ll be ready to move on to gathering materials and starting your project.
Ready to dive into the next steps? Let’s keep the green goodness going!
Materials and Tools
Alright, you’ve got your space and plant choices sorted, and now it’s time to get your hands on the right materials and tools. Don’t worry if you’re not a DIY expert—getting the basics right is all you need to build an awesome vertical plant wall. Let’s break down what you’ll need.

Materials Needed
First up, let’s talk materials. You’ll need a few key items to get your vertical plant wall up and running:
- Wall-Mounted Planters or Frames: These are the structures that will hold your plants. You can go for pre-made planters designed for vertical gardening, or you can create a custom frame. If you’re looking for something easy, wall-mounted planters come in various styles and sizes.
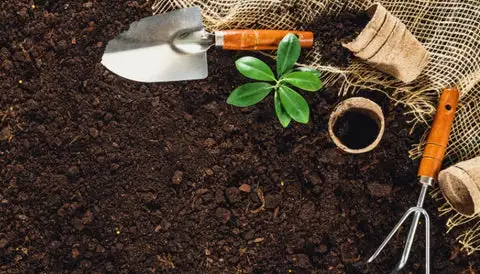
- Soil and Growing Medium: Plants need a good home to grow in, and that means quality soil or a suitable growing medium. For most vertical plant walls, a mix of potting soil and some compost or perlite will do the trick. This helps with drainage and keeps your plants healthy.
- Irrigation System (Optional): Depending on how many plants you’re using and how much maintenance you want to do, an irrigation system might be a great addition. Drip irrigation systems are popular for vertical gardens because they deliver water directly to the plants, which can save you a lot of hassle.
- Plant Support Structures: Depending on the plants you choose, you might need some extra support. Trellises or grids can help climbing plants find their way up the wall, and they add a nice visual element too.
Tools Required
Now let’s talk tools. Here’s what you’ll need to get the job done:
- Drill or Screwdriver: If you’re mounting planters or frames directly onto the wall, a drill or screwdriver is essential. You’ll use these to install screws or anchors to hold your planters securely.
- Level: A level is crucial to ensure everything is straight and aligned. No one wants a crooked plant wall! This tool will help you keep things neat and professional-looking.
- Measuring Tape: Before you start drilling, you’ll need to measure and mark where everything will go. A measuring tape will help you get accurate dimensions and placements.
- Gardening Tools: A few basic gardening tools will make your life easier. Think trowels for planting, a watering can for hydration, and maybe a pair of gloves to keep your hands clean.
Gathering Everything You Need
Before you start your project, make sure you’ve got all these materials and tools ready to go. You don’t want to be running out for supplies in the middle of your build. Once you’ve got everything on hand, you’ll be set for a smooth and enjoyable building process.
Ready to gather your materials and tools? With these basics, you’ll be well-equipped to create a stunning vertical plant wall. Next up, we’ll dive into the actual building process—let’s get planting!
Building the Vertical Plant Wall
Excited to get your hands dirty and start building your vertical plant wall? Awesome! This is where all your planning and preparation come together. Don’t worry if you’re not a DIY pro—this guide will walk you through the steps to create a beautiful and functional green wall. Let’s jump into the process!

Preparation
Before you start hanging planters or installing frames, you need to prepare the wall. Here’s how:
- Preparing the Wall Surface: First things first, make sure your wall is clean and in good condition. If you’re installing your vertical plant wall indoors, wipe down the surface to remove any dust or dirt. For outdoor walls, check for any peeling paint or damage that might need fixing. If your wall needs a fresh coat of paint or a primer, now’s the time to do it. A clean, smooth surface will help ensure your planters stay securely in place.
- Assembling Materials: Gather all your materials and tools in one place. It’ll make the building process smoother if you have everything you need within arm’s reach. Check that you have all the planters, soil, irrigation components, and any other materials you’ll be using.
Mounting the Frame or Planters
Next up is the exciting part—getting your planters or frame on the wall! Here’s how to do it:
- Measuring and Marking the Wall: Use your measuring tape and level to mark where your planters or frame will go. It’s essential to get accurate measurements and ensure everything is level. Mark the spots for screws or anchors with a pencil. This will help you place everything precisely and avoid any mishaps.
- Installing the Frame or Planters: Depending on what you’re using, you might need to drill holes and insert anchors before screwing in the frame or planters. Follow the instructions that come with your materials, and make sure everything is securely fastened. Double-check with your level to ensure everything is straight and aligned.
Setting Up the Irrigation System (if applicable)
If you’re using an irrigation system, now’s the time to set it up:
- Types of Irrigation Systems: Drip irrigation is a popular choice for vertical plant walls because it delivers water directly to the roots of your plants. You can also opt for self-watering systems if you prefer something low-maintenance.
- Installation and Setup: Follow the instructions for your chosen irrigation system. Generally, you’ll need to set up tubing or hoses, connect them to a water source, and position the emitters or watering components so that all your plants receive adequate water. Test the system to make sure it’s working correctly and adjust as needed.
Planting
With your frame or planters in place and your irrigation system set up (if using one), it’s time to plant:
- Preparing the Plants and Soil: Before you start planting, prepare your soil and plants. If you’re using potting soil, mix it with compost or perlite to improve drainage. For each plant, gently loosen the roots if they’re tightly bound and make sure they’re ready to go into the planters.
- Arranging Plants According to the Design: Based on your earlier design sketch, start placing plants in the planters or on the wall. Arrange taller plants at the bottom and shorter ones at the top, or follow your design layout for a balanced look.
- Planting Techniques: For each plant, make a hole in the soil that’s slightly larger than the root ball. Place the plant in the hole, fill in with soil, and gently press down to secure it. Water each plant thoroughly after planting to help settle the soil and reduce any transplant shock.
Wrapping It Up
And there you have it! Your vertical plant wall is coming to life. With your planters or frame installed, irrigation system set up, and plants in place, you’re ready to start enjoying your new green wall. Keep an eye on your plants as they settle in, and stay tuned for tips on maintaining and caring for your vertical garden.
Ready to see your plant wall thrive? Let’s keep going with maintenance and care tips to ensure your green wall stays gorgeous and healthy!
Maintenance and Care
Congratulations on building your stunning vertical plant wall! Now that it’s up and running, it’s time to keep it looking lush and vibrant. Maintaining your plant wall doesn’t have to be complicated, but a bit of regular care will go a long way in ensuring your plants thrive. Let’s dive into how you can keep your green wall in top shape.
Watering and Feeding
One of the most important aspects of plant care is watering. Here’s how to keep your plants hydrated and healthy:
- Watering Schedules and Techniques: Depending on the type of plants you’ve chosen and their light conditions, your watering needs might vary. Generally, it’s a good idea to check the soil moisture regularly. Stick your finger into the soil; if it feels dry a couple of inches down, it’s time to water. For a vertical plant wall, you might need to water more frequently, especially if you’re using a drip irrigation system. Make sure not to overwater, as this can lead to root rot.
- Fertilizing Tips: Plants in vertical walls can benefit from a little extra nutrition. Use a balanced, water-soluble fertilizer to feed your plants every few weeks during the growing season. Follow the instructions on the fertilizer package for the right amount and frequency. Over-fertilizing can harm plants, so less is often more.
Pruning and Training
Keeping your plants well-pruned and properly trained helps maintain a neat appearance and encourages healthy growth:
- Pruning Techniques for Vertical Growth: Regular pruning helps your plants stay compact and encourages new growth. Remove any dead or yellowing leaves, and trim back overgrown areas to maintain the shape of your plant wall. For climbing plants, gently trim or pinch back any stems that are getting too long or unruly.
- Training Plants to Grow in the Desired Direction: If you have climbing or vining plants, you may need to guide them to grow along the frame or trellises. Use plant ties or clips to secure stems to the support structures. As your plants grow, adjust the ties to keep them in place and encourage a full, even coverage.
Pest and Disease Control
Healthy plants are less likely to suffer from pests and diseases, but it’s still good to keep an eye out:
- Identifying Common Pests: Look out for signs of common pests like aphids, spider mites, or mealybugs. These pests can cause damage to your plants if left unchecked. If you spot any unwanted visitors, address them promptly.
- Treatments and Preventative Measures: If you notice pests, you can often treat them with natural remedies or insecticidal soap. For disease issues, remove affected plant parts and ensure good air circulation around your plants. Keeping your plant wall clean and well-maintained can help prevent many common problems.
Wrapping It Up
With regular watering, feeding, pruning, and pest control, your vertical plant wall will continue to be a beautiful and thriving part of your space. It’s all about keeping an eye on your plants and giving them the care they need to stay healthy and vibrant.
Enjoy the process of watching your vertical garden grow and evolve. It’s a rewarding experience that adds a touch of nature and tranquility to your home or garden. Ready to tackle any issues that come your way? You’ve got this!
Troubleshooting Common Issues
Even the best-laid plans can run into a few bumps along the way, and your vertical plant wall is no exception. Don’t worry, though—most issues are fixable with a little know-how. Let’s go over some common problems you might encounter and how to handle them so your plant wall stays looking its best.
Plant Health Issues
Sometimes, plants in your vertical garden might show signs of stress. Here’s how to spot and solve some typical plant health problems:
- Yellowing Leaves: If your plants have yellowing leaves, it could be a sign of overwatering or nutrient deficiencies. Check the soil to make sure it’s not soggy and adjust your watering routine if needed. Also, ensure your plants are getting the right amount of nutrients. A balanced fertilizer can help address deficiencies.
- Wilting: Wilting can occur if plants aren’t getting enough water or if there’s a problem with the roots. Make sure you’re following a proper watering schedule and that your irrigation system (if you have one) is working correctly. If wilting persists, check for root issues or soil compaction.
- Brown Spots or Leaf Drop: Brown spots can indicate issues like sunburn, pests, or fungal infections. If your plants are getting too much direct sunlight, consider relocating them to a spot with indirect light. For pest or disease problems, identify the cause and treat it with appropriate solutions.
Structural Issues
Your vertical plant wall’s structure is crucial to its success. Here’s how to deal with common structural problems:
- Frame Instability: If your frame feels wobbly or unstable, it might not be securely attached to the wall. Double-check that all screws or anchors are properly installed. Reinforce any weak spots and ensure that the frame is level and firmly fixed.
- Planter Detachment: If planters start coming loose or falling off, it’s often due to inadequate mounting or weight distribution. Check that all planters are securely attached and consider adding extra supports if needed. Make sure the weight of the soil and plants is evenly distributed.
Wrapping It Up
Dealing with issues on your vertical plant wall doesn’t have to be stressful. With a little attention and some simple fixes, you can keep your green wall healthy and beautiful. Regular checks and maintenance will help you catch problems early and keep your plant wall thriving.
Remember, every plant wall has its own quirks, and part of the fun is figuring out what works best for yours. Keep an eye on your plants, stay on top of maintenance, and don’t hesitate to make adjustments as needed. You’ve got this!
Enhancing Your Vertical Plant Wall
Your vertical plant wall is looking great, but why stop there? With a few extra touches, you can take it from fantastic to truly spectacular. Whether you want to add some decorative elements or make seasonal adjustments, there’s plenty you can do to make your green wall even more amazing. Let’s explore some ideas to enhance your vertical garden!
Adding Decorative Elements
Your plant wall is already a statement piece, but you can add some extra flair with these decorative touches:
- Lights: String lights or spotlights can add a magical touch to your vertical plant wall, especially in the evenings. Not only do they look stunning, but they can also provide additional light for your plants, helping them grow better if they’re in a low-light area.
- Artwork: Consider adding some artwork or decorative panels to complement your plant wall. This could be anything from metal sculptures to framed prints. Just make sure any additions are mounted securely and won’t interfere with your plants’ growth.
- Additional Accessories: You might also add things like decorative planters, small shelves, or even garden gnomes. These small touches can personalize your vertical wall and make it uniquely yours.
Seasonal Considerations
As the seasons change, so can your plant wall. Here’s how to keep it looking fresh year-round:
- Adjusting Care for Different Seasons: In colder months, you may need to adjust your watering and feeding routines. For indoor walls, reduce watering as plants generally require less moisture in winter. For outdoor walls, protect your plants from frost and harsh weather conditions.
- Choosing Seasonal Plants: You can also swap out plants to reflect the seasons. For example, add seasonal flowers or foliage in spring and summer, and switch to hardy, evergreen plants for winter. This keeps your vertical wall vibrant and in tune with the time of year.
Wrapping It Up
Enhancing your vertical plant wall is all about adding those special touches that make it truly yours. From lights and artwork to seasonal plant changes, these additions can make your green wall even more beautiful and functional.
Enjoy the process of personalizing your plant wall and watching it evolve with each season. With a bit of creativity and care, your vertical garden will be a standout feature in your home or garden, bringing joy and a touch of nature to your space.
Ready to get creative? Let’s make your vertical plant wall the highlight of your space!
Conclusion
Congratulations on making it to the end of your vertical plant wall journey! By now, you’ve transformed a plain wall into a lush, green paradise that’s both beautiful and functional. Let’s wrap up everything you’ve accomplished and get you excited about keeping your green wall thriving.
Recap of Key Steps
We’ve covered a lot of ground, from planning and selecting the right plants to building and maintaining your vertical plant wall. To recap:
- Planning: You measured your space, chose plants suited to your light and climate, and designed a layout that fits your style.
- Materials and Tools: You gathered all the essentials, including planters, soil, and tools, to get the job done right.
- Building: You mounted your frame or planters, set up irrigation (if needed), and planted your greenery with care.
- Maintenance: You learned how to water, feed, prune, and troubleshoot common issues to keep your wall looking its best.
- Enhancements: You explored ways to add decorative touches and make seasonal adjustments to keep your plant wall fresh and vibrant.
Encouragement for Ongoing Care
Remember, the key to a thriving vertical plant wall is ongoing care. Regular watering, feeding, and maintenance will keep your plants healthy and your wall looking stunning. Don’t be afraid to make adjustments and experiment with new plants or design ideas as you go along.
Resources for Further Reading
If you’re eager to dive deeper into the world of vertical gardening, there are plenty of resources to help you expand your knowledge. Check out gardening books, online forums, and local plant nurseries for more tips and inspiration. You might discover new plant varieties or techniques that can enhance your green wall even further.
Final Thoughts
Creating a vertical plant wall is a rewarding project that adds a unique touch of nature to your space. It’s a chance to express your creativity, improve your environment, and enjoy the beauty of living plants.
Thank you for following along with this guide. We hope you’ve found it helpful and inspiring. Now, go out there and enjoy the fruits of your labor—your vertical plant wall is a testament to your hard work and green thumb!


