Contents
Introduction
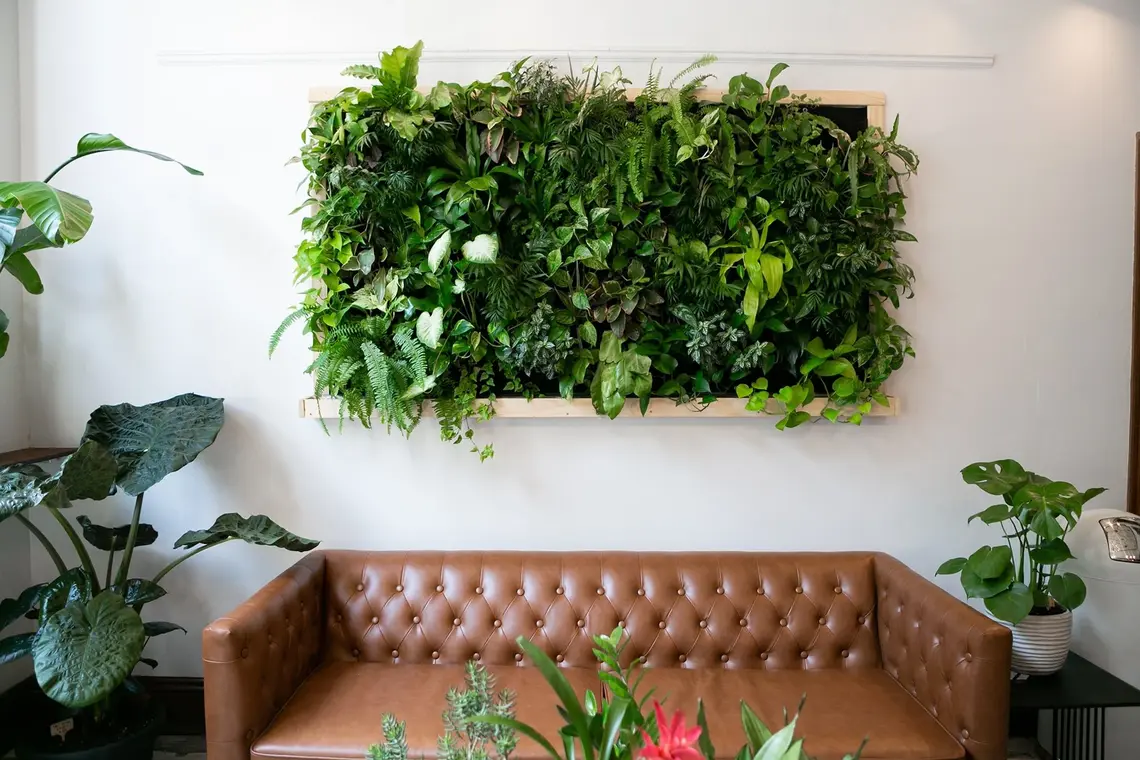
Are you looking to bring a splash of nature into your home without dealing with a full-on garden? A stylish indoor plant wall might just be the perfect solution! Not only does it add a vibrant touch of green to your space, but it also helps improve air quality and creates a calming atmosphere. Plus, it’s a great way to show off your love for plants in a super eye-catching way.
Creating a plant wall doesn’t have to be complicated or require a lot of fancy materials. With just a few simple supplies and a bit of creativity, you can transform any blank wall into a lush, living display. This guide will walk you through the whole process, from picking the right spot in your home to choosing the best plants and arranging them beautifully.
We’ll break things down step-by-step so you don’t need to be a DIY expert to get it right. Whether you’re a seasoned plant enthusiast or just starting out, you’ll find easy tips and tricks to make your plant wall the envy of all your friends. Ready to turn that boring wall into a green masterpiece? Let’s dive in and get started!
Planning Your Plant Wall
Before diving into the fun part of creating your plant wall, it’s important to do a little prep work. This will make the whole process smoother and ensure your plant wall turns out just how you envision it.

Choosing the Location
First things first, you need to pick the perfect spot for your plant wall. Think about a wall that’s easily visible and where you want to add a touch of greenery. Ideally, this should be a space that gets the right amount of light for the plants you choose. Some plants love bright, indirect sunlight, while others are perfectly happy in lower light conditions. Also, make sure the wall you select can handle the weight of the plants and any mounting hardware you’ll use.
Selecting Plants
Next up, let’s talk plants! The key is to choose plants that will thrive in the lighting conditions of your chosen spot. If your wall gets a lot of natural light, you might go for lush, leafy plants like ferns or pothos. For shadier spots, consider hardy options like snake plants or air plants. Don’t forget to think about how much time you’re willing to spend on plant care. Some plants need regular watering and attention, while others are pretty low-maintenance.
Design Considerations
Now comes the fun part: designing your plant wall! You’ll want to decide on a layout that looks great and fits your space. Think about whether you want a vertical garden that reaches up the wall or a more horizontal arrangement. Play around with different shapes and sizes of plant holders to create a balanced look. Sketching out your design can be really helpful here – it doesn’t have to be fancy, just a rough idea of where you want everything to go.
By planning ahead, you’ll make sure that your plant wall not only looks amazing but also works well with your home’s style and your plant care routine. With a little preparation, you’re all set to start bringing your green wall to life!
Materials and Tools
Now that you’ve got your plant wall location and design sorted, it’s time to gather your materials and tools. Don’t worry—this part is pretty straightforward, and you don’t need to break the bank to get started. Let’s go over what you’ll need to make your plant wall a reality.

Essential Materials
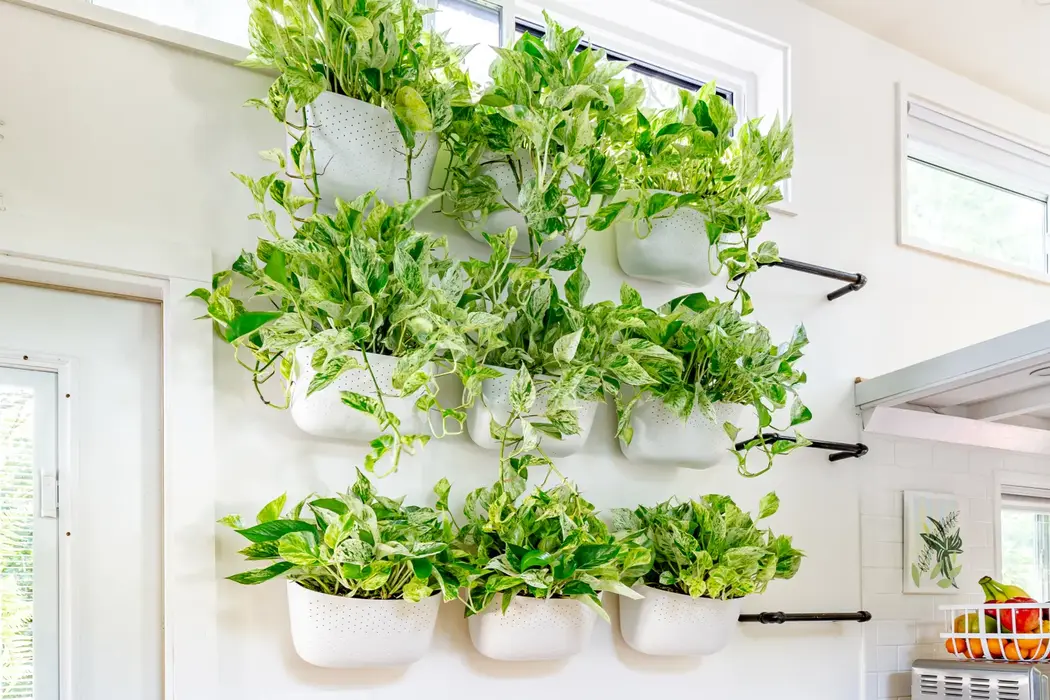
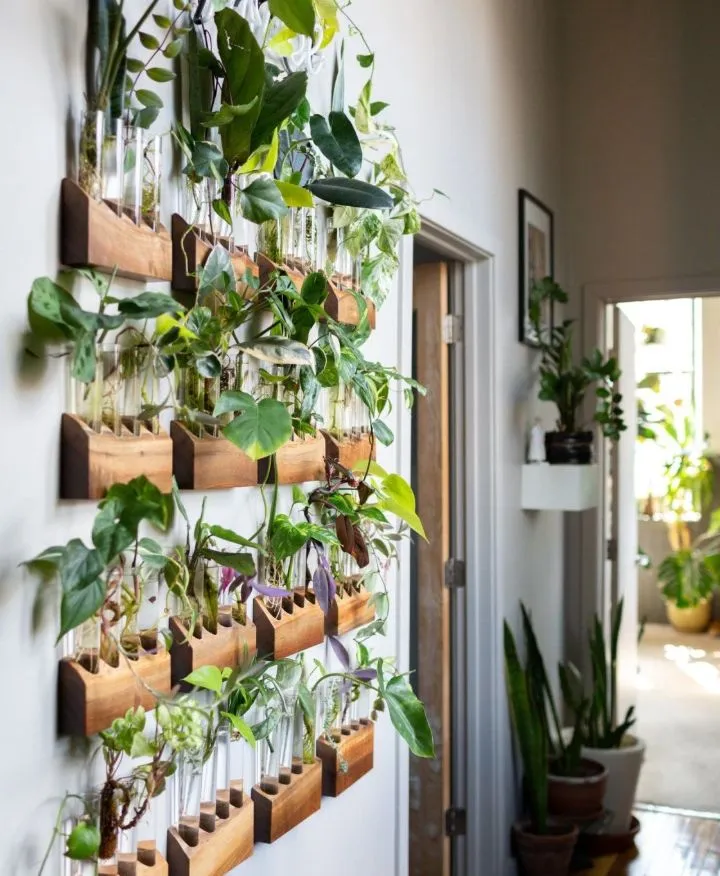
- Plant Holders: These are the containers where your plants will live. You can choose from various options, like wall-mounted planters, pocket planters, or modular grids. Wall-mounted planters are great for a clean, minimalist look, while pocket planters offer a charming, almost pocket-sized space for your plants. Modular grids let you mix and match different plant holders to create a custom design.
- Mounting Hardware: To secure your plant holders to the wall, you’ll need some mounting hardware. This might include hooks, brackets, screws, or adhesive strips. Hooks and brackets are sturdy and reliable, but adhesive strips can be a great option if you’re renting and don’t want to make holes in the wall.
- Support Structures: Depending on your design, you might need some additional support. Wood panels, metal frames, or mesh panels can all help provide a solid backing for your plant holders. These structures help keep everything in place and can add an extra design element to your plant wall.
Optional Materials
- Decorative Elements: If you want to add a personal touch to your plant wall, consider incorporating some decorative elements. Fairy lights can add a magical glow, while small shelves can display decorative items or additional plants. Artistic frames or hanging decorations can also enhance the overall look of your wall.
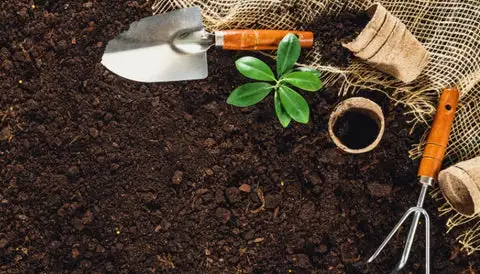
- Additional Tools: A few handy tools will make the installation process smoother. A drill is essential for making holes in the wall for mounting hardware, while a level ensures that everything is straight. A measuring tape helps you get precise measurements, and potting soil is a must for keeping your plants happy and healthy.
With these materials and tools in hand, you’ll be well-equipped to start creating your stylish indoor plant wall. Just gather everything you need, and you’ll be ready to bring your green vision to life!
Preparing the Wall
Before you start hanging plant holders and arranging your greenery, it’s crucial to prepare the wall properly. This step ensures that your plant wall will stay secure and look fantastic for years to come. Here’s how to get your wall ready for the big transformation.

Cleaning the Surface
The first step in preparing your wall is to give it a good clean. Dust, dirt, and grime can interfere with how well your mounting hardware sticks to the wall. Use a damp cloth or a mild cleaning solution to wipe down the area where you’ll be installing your plant holders. Make sure the wall is completely dry before moving on to the next steps.
Protecting the Wall
To prevent any accidental damage, it’s a good idea to protect your wall during installation. Lay down a drop cloth or some old newspapers on the floor beneath the area where you’ll be working. If you’re concerned about potential damage or stains from drilling or adhesive, you can also use painter’s tape around the edges of your work area. This will help keep your wall looking pristine.
Marking the Layout
Now it’s time to plan where everything will go. Measure and mark the positions for your plant holders and any support structures. Use a pencil to make light, temporary marks on the wall so you can easily adjust things if needed. It’s helpful to use a level to ensure that your marks are straight and aligned. This will make the installation process smoother and ensure that your plant wall looks neat and balanced.
By taking the time to clean, protect, and mark your wall, you’re setting yourself up for a successful and stress-free installation. With these preparations done, you’re ready to start mounting your plant holders and bringing your stylish plant wall to life!
Installing the Plant Holders
With your wall all prepped and ready, it’s time to dive into the fun part—installing the plant holders! This is where your vision starts to take shape, so let’s go through the steps to ensure everything is securely mounted and looking great.
Mounting Techniques
- Wall-Mounted Planters: If you’re using wall-mounted planters, you’ll need to drill holes into the wall to attach them. Start by marking the positions for the screws or anchors based on your measurements. Use a drill to create the holes, then insert wall anchors if needed. Next, screw in the mounting brackets or directly attach the planters if they come with built-in mounting hardware. Make sure everything is secure and level before moving on to the next planter.
- Adhesive Planters: For a simpler installation, adhesive planters are a great choice. Clean the wall thoroughly and make sure it’s completely dry. Apply the adhesive strips or hooks according to the manufacturer’s instructions. Press the planters firmly into place and give the adhesive time to set before adding any plants. This method is perfect if you’re in a rental and want to avoid drilling holes.
Ensuring Stability
Once your plant holders are installed, it’s crucial to check their stability. Gently tug on each holder to ensure it’s firmly attached to the wall. For wall-mounted planters, double-check that the screws or anchors are secure and that the planters are level. If you notice any wobbling or instability, make adjustments as needed. It’s better to address these issues now to avoid any problems later.
With your plant holders securely mounted and stable, you’re ready to move on to the next step—arranging and planting. This is where you get to bring your plant wall design to life, so get excited!
Arranging and Planting
Now that your plant holders are securely installed, it’s time to bring your plant wall to life with some greenery. This is where you can get creative and start arranging your plants to make your wall look beautiful and vibrant. Here’s how to get it all set up:
Potting the Plants
Start by potting your plants if they’re not already in pots. Choose the right type of soil for each plant—some prefer well-draining soil, while others do better in moisture-retentive mixes. Gently remove the plants from their nursery pots and place them into your new containers, adding soil as needed to fill in any gaps. Make sure the plants are snug but not too tightly packed.
Arranging Plants
With your plants potted, it’s time to arrange them in the plant holders. Consider the light needs of each plant when deciding where to place them. For example, place sun-loving plants in areas that receive more light and shade-tolerant plants in dimmer spots. Aim for a mix of heights, textures, and colors to create a balanced and visually interesting arrangement. If you’re using modular grids or pocket planters, experiment with different configurations before settling on a final layout.
Maintenance Tips
Once your plant wall is set up, it’s important to keep your plants healthy. Here are some maintenance tips to help your plant wall thrive:
- Watering: Establish a regular watering schedule based on the needs of your plants. Some might need more frequent watering, while others prefer to dry out between waterings. Check the soil moisture regularly to avoid over or under-watering.
- Fertilizing: Feed your plants with a suitable fertilizer according to their specific needs. Generally, a balanced, all-purpose fertilizer works well for most indoor plants. Follow the instructions on the fertilizer package for the best results.
- General Care: Keep an eye out for pests or signs of plant stress. Remove any dead or yellowing leaves to promote healthy growth. Rotate the plants occasionally if they’re not growing evenly to ensure they get adequate light on all sides.
With your plants arranged and properly cared for, your indoor plant wall will start to flourish and become a stunning focal point in your space. Enjoy the process of watching your green wall grow and evolve over time!
Enhancing the Plant Wall
Your plant wall is looking great and the plants are thriving—now it’s time to add those finishing touches that will make your green display even more stylish and unique. Here’s how to enhance your plant wall and really make it pop:
Adding Decorative Elements
To give your plant wall a personal touch and make it stand out, consider incorporating some decorative elements. Fairy lights are a fantastic way to add a soft, magical glow to your plant wall, especially in the evenings. You can drape them around the plants or weave them through the holders. Small shelves or wall-mounted hooks can also be used to display additional decorative items like candles, small sculptures, or even extra plants.
Creating a Focal Point
Think about creating a focal point to draw attention and add interest to your plant wall. This could be a particular section of your wall that features a standout plant or a unique arrangement. You might use a larger planter or a distinctive plant holder to create a visual centerpiece. Alternatively, you could use a decorative frame or a piece of artwork as a backdrop for a cluster of plants, making it a focal feature of your wall.
Seasonal Updates
One of the joys of having a plant wall is that you can refresh and update it with the seasons. As the weather changes, you might swap out some plants for seasonal varieties or change up the decorative elements to match the time of year. In spring and summer, you might add vibrant, flowering plants, while in fall and winter, you could incorporate seasonal decorations like small pumpkins or pinecones.
Enhancing your plant wall is all about adding personal flair and keeping the look fresh and engaging. With these tips, you can keep your plant wall looking fabulous and continually evolving with your style and the seasons. Enjoy the process of making your green space uniquely yours!
Troubleshooting and Care
With your plant wall up and running, it’s important to keep an eye on its health and address any issues that might come up. Here’s how to troubleshoot common problems and ensure your plant wall stays beautiful and thriving.
Common Issues
- Plant Wilting: If your plants start wilting, it could be a sign of either too much or too little water. Check the soil moisture—if it’s dry, the plants need water; if it’s soggy, you might be over-watering. Adjust your watering schedule accordingly. Wilting can also be caused by inadequate light, so make sure your plants are getting the right amount of sunshine.
- Pest Infestations: Occasionally, indoor plants can attract pests like spider mites, aphids, or mealybugs. Inspect your plants regularly for any signs of pests. If you spot any, treat the affected plants with an appropriate insecticide or natural remedy. Keeping your plant wall clean and removing any dead leaves can help prevent pest problems.
- Wall Damage: If you notice any damage to your wall, such as stains or peeling paint, it might be due to moisture from the plants. Make sure your plant holders are properly sealed and that excess water isn’t dripping onto the wall. You can also use wall protectors or place trays under the plant holders to catch any excess water.
Regular Maintenance
To keep your plant wall looking its best, establish a routine for regular maintenance:
- Cleaning: Wipe down the plant holders and any decorative elements to remove dust and keep everything looking fresh. Clean the leaves of your plants gently with a damp cloth to help them stay healthy and vibrant.
- Health Checks: Periodically check your plants for signs of stress, such as yellowing leaves or stunted growth. Address any issues promptly to keep your plants in top shape.
- Adjustments: As your plants grow, they might need to be repositioned or replanted. Make adjustments to the arrangement if necessary to ensure all plants have enough space and light.
By keeping an eye on potential issues and performing regular maintenance, you’ll ensure that your plant wall remains a stunning and thriving feature in your home. With a little care and attention, your green wall will continue to brighten up your space and bring you joy for years to come!
Conclusion
Congratulations! You’ve successfully created a stylish indoor plant wall that’s sure to be the centerpiece of your space. By following these steps, you’ve transformed a blank wall into a vibrant, green oasis. Here’s a quick recap and some final tips to make the most of your new plant wall.
Recap of Key Points
Let’s review what you’ve accomplished:
- Planning: You picked the perfect spot and chosen plants that will thrive in your chosen lighting conditions.
- Materials and Tools: You gathered everything you needed, from plant holders to decorative elements.
- Preparation: You cleaned and protected your wall, and carefully marked out where everything would go.
- Installation: You securely mounted your plant holders and ensured they were stable.
- Arranging and Planting: You arranged your plants thoughtfully, taking into account their care needs and the overall design.
- Enhancing: You added decorative touches to make your plant wall uniquely yours and decided to update it with the seasons.
- Troubleshooting and Care: You learned how to handle common issues and keep your plant wall in great condition.
Encouragement
Creating a plant wall is not just about adding greenery to your home—it’s about expressing your style and bringing a bit of nature indoors. Enjoy the process of watching your plants grow and evolve, and don’t be afraid to experiment with new plants or arrangements. Your plant wall is a living piece of art that reflects your personal taste and adds beauty to your home.
Call to Action
Now that you’ve got your stunning plant wall, share your creation with friends and family! Post photos on social media to inspire others or invite loved ones over to admire your work. Don’t forget to celebrate your DIY success and take pride in your green thumb. Keep enjoying your plant wall, and remember that with a bit of care, it will continue to thrive and bring a touch of nature to your everyday life.


