Contents
Introduction
Hey there, plant lovers! 🌿 Are you tired of seeing the same old boring planters in your home? Looking for a fun and creative way to add a personal touch to your indoor garden? Well, you’re in the right place! DIY planters are not only a fantastic way to showcase your favorite plants but also a brilliant opportunity to unleash your inner artist. Whether you’re a seasoned green thumb or just starting your plant journey, crafting your own unique pots can turn an ordinary space into a vibrant, personalized oasis.
Imagine this: You’ve got a cozy corner in your living room, but it’s missing that special something. Instead of grabbing another cookie-cutter pot from the store, why not make your own? DIY planters allow you to design and create pots that perfectly match your home decor and reflect your personality. Plus, making them yourself can be incredibly rewarding. It’s a chance to recycle old items, experiment with different materials, and even save a bit of cash!
In this guide, we’ll walk you through everything you need to know to start your DIY planter project. From choosing the right type of planter for your space to picking out the best materials and techniques, we’ve got you covered. We’ll also dive into some easy projects that are perfect for beginners, as well as more advanced ideas for those ready to tackle something a bit more challenging. And don’t worry if you’re not a craft pro—we’ll keep things simple and straightforward so you can focus on having fun and creating beautiful, functional planters.
Ready to get started? Let’s dig into the world of DIY planters and transform your indoor garden into a stunning showcase of creativity and style. Your plants (and your home) will thank you!
Planning Your DIY Planter
Alright, let’s dive into the exciting world of planning your DIY planters! Before you grab your paintbrush or start digging through your recycling bin, it’s important to get a clear idea of what you want and need. Don’t worry—this part is all about dreaming up your perfect planter and figuring out how to make it happen.

First things first, let’s talk about the type of planter that’s right for you. Are you picturing a charming hanging planter to add some green to your walls, or maybe a stylish table-top pot to brighten up your coffee table? There are tons of options out there—hanging planters, wall-mounted planters, and good old-fashioned table-top pots. Think about where you want your plants to go and how much space you have. For example, if you’re tight on floor space, a wall-mounted or hanging planter might be your best bet. If you’ve got a little more room to play with, a large table-top planter could make a bold statement.
Next up, let’s chat about materials. You can get super creative here! Common choices include terracotta (classic and sturdy), wood (natural and rustic), metal (modern and sleek), and plastic (lightweight and versatile). And don’t forget about recycled items—old mugs, tin cans, and even wooden crates can be transformed into unique planters with just a little bit of DIY magic. When choosing materials, think about how long you want your planter to last and how it will fit into your home’s decor. For instance, terracotta is great for a traditional look, while metal or recycled materials might give you a more contemporary vibe.
Now, onto the fun part—design inspiration! This is where you can really let your creativity shine. Scour Pinterest, Instagram, and gardening blogs for ideas that make your heart race. Maybe you love the idea of a colorful, painted pot, or perhaps a sleek, minimalist concrete planter is more your style. Don’t be afraid to mix and match ideas to create something truly one-of-a-kind. Your home is a reflection of you, so why not let your planters be too?
Planning your DIY planter is all about envisioning your project and gathering the materials that’ll bring your vision to life. So, grab a notebook, sketch out some ideas, and start dreaming up the perfect planter to show off your favorite indoor plants. Ready to get those creative juices flowing? Let’s make some planter magic!
Basic DIY Planter Projects
Ready to roll up your sleeves and dive into some fun DIY planter projects? This section is all about getting your hands dirty with some simple, creative, and totally doable planter ideas that are perfect for beginners. These projects will help you get started on your DIY journey and bring a touch of homemade charm to your indoor garden.

Terracotta Pot Makeover
Let’s kick things off with a classic: the terracotta pot makeover. Terracotta pots are affordable, versatile, and a great canvas for your creative flair. Here’s how you can transform these plain pots into eye-catching pieces.
- Materials: Grab some terracotta pots, acrylic paint in your favorite colors, paintbrushes, and a sealant to protect your artwork.
- Steps: Start by cleaning the pots thoroughly to remove any dust or grime. Next, paint the pots with a base color or pattern of your choice. Once the paint is dry, add any additional designs or decorations. Finish by applying a clear sealant to keep your masterpiece looking fresh and vibrant.
Wooden Planter Box
If you’re up for a bit of woodworking fun, a wooden planter box is a fantastic project. It’s a great way to add a rustic touch to your home and can be customized to any size you need.
- Materials: You’ll need wood planks (think cedar or pine), nails or screws, wood glue, and paint or stain to finish it off.
- Steps: Measure and cut the wood planks to your desired size. Assemble the pieces into a box shape using wood glue and nails or screws. Once your box is assembled, sand it down to smooth out any rough edges. Finally, paint or stain the wood to protect it and give it a polished look.
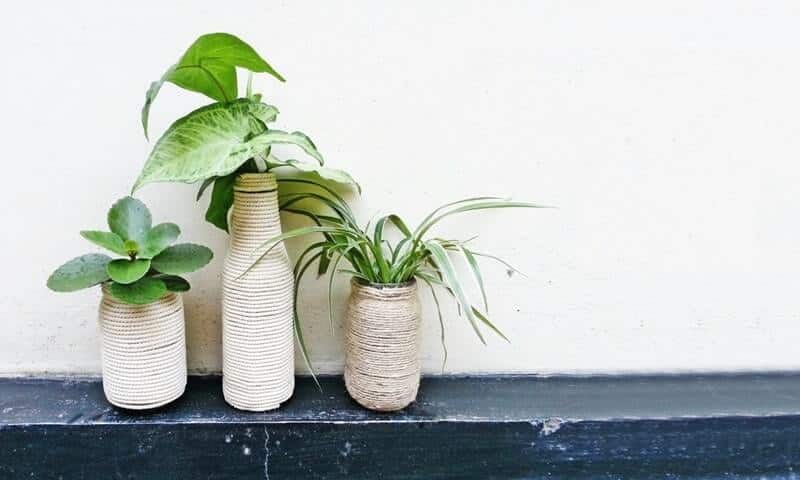
Plastic Bottle Planter
Looking for a super easy and eco-friendly project? Repurposing plastic bottles into planters is a fun way to recycle and get creative.
- Materials: Gather some plastic bottles, scissors, paint, and anything else you’d like for decorating.
- Steps: Start by cutting the bottles to your desired height. You can leave them as they are or paint them to add a splash of color. Don’t forget to poke some drainage holes at the bottom so your plants won’t get waterlogged. Plant your favorite greenery, and you’ve got yourself a cool, recycled planter!
These basic DIY planter projects are a great way to start your crafting adventure. They’re simple, fun, and the perfect way to add a touch of personality to your indoor plants. Grab your materials, follow the steps, and watch as your plain pots turn into unique, eye-catching planters. Ready to get started? Let’s make some planter magic!
Advanced DIY Planter Projects
Feeling confident with your basic planter skills and ready to tackle something a bit more challenging? Awesome! Let’s step up the game with some advanced DIY planter projects that will not only impress your friends but also add a stunning touch to your indoor garden. These projects are perfect for those who want to push their creative boundaries and experiment with new techniques.
Concrete Planters
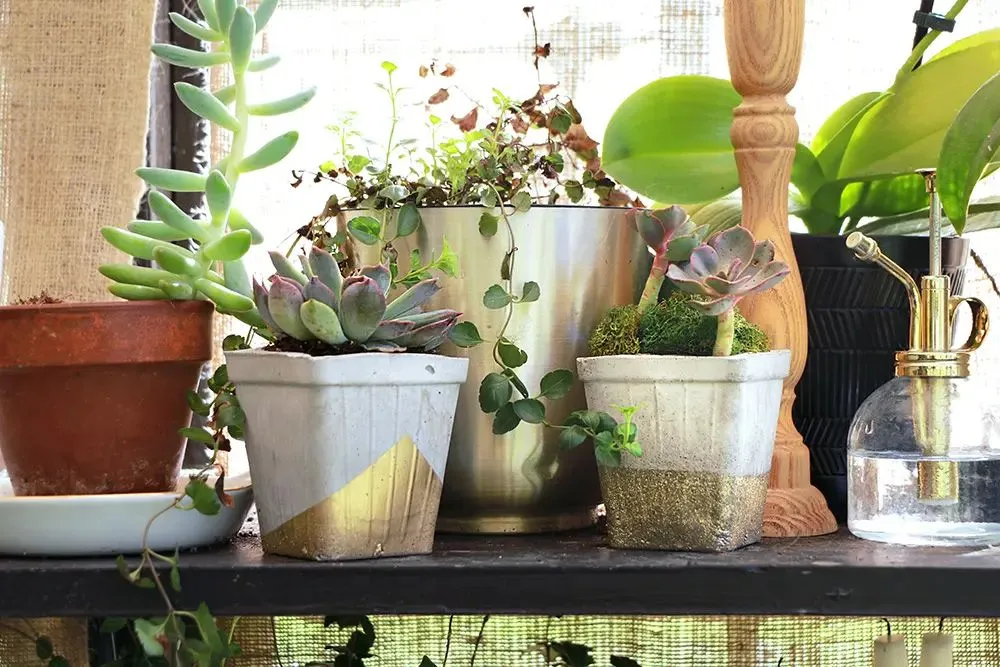
If you’re looking to add a modern, industrial flair to your space, concrete planters are the way to go. They’re durable, stylish, and surprisingly easy to make!
- Materials: You’ll need concrete mix (available at most hardware stores), molds (silicone molds work great), gloves, and sandpaper for finishing touches.
- Steps: Start by mixing your concrete according to the package instructions. Pour the mixture into your molds and let it set. Once the concrete is fully cured, carefully remove it from the mold. If needed, sand down any rough edges to give it a smooth finish. You can also paint or seal the concrete to add a pop of color or extra protection.
Hanging Planters
Hanging planters are a fantastic way to save space and create a lush, floating garden. Plus, they add a unique, eye-catching element to any room.
- Materials: For this project, you’ll need macramé cord (or any sturdy rope), rings (to hold the planter), pots (or containers), and hooks for hanging.
- Steps: Start by cutting the macramé cord into lengths and tying knots to create a supportive net for your pot. Attach the net to the ring and make sure it’s secure. You can then place your pot in the net and hang it from the ceiling using hooks. If you’re new to macramé, there are plenty of online tutorials to help you with knotting techniques.
Geometric Planters
Geometric planters are perfect for those who love modern design and clean lines. These planters add a contemporary touch and can be customized to fit any style.
- Materials: Grab some cardboard or wood, glue, and paint in your favorite shades.
- Steps: Start by creating geometric shapes from your chosen material. Assemble these shapes into a planter form using glue. Once the glue is dry, paint your geometric planter in colors or patterns that match your decor. If you’re using cardboard, consider sealing it with a waterproof spray to protect it from moisture.
These advanced DIY planter projects are a fantastic way to challenge yourself and add some seriously stylish elements to your indoor garden. They might take a bit more effort, but the results are definitely worth it. So, gather your materials, follow the steps, and get ready to impress with your handcrafted planters!
Upcycling and Recycled Planter Ideas
Ready to give old items a new life and create something unique for your indoor plants? Upcycling and recycling are not just eco-friendly—they’re also a blast! This section is all about turning everyday objects and leftovers into stylish, functional planters. Let’s dive into some creative ideas that will help you make the most out of things you already have lying around.

Repurposing Old Containers
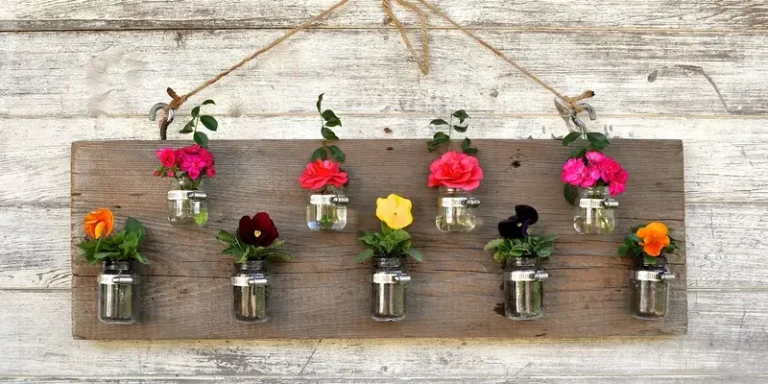
Got a bunch of old mugs, jars, or tins gathering dust in your kitchen? Perfect! These everyday items can easily be transformed into charming planters.
- Materials: Look for old mugs, jars, tins, or cans, plus paint or markers for decoration.
- Steps: Start by cleaning out your containers thoroughly. For items like cans or tins, be sure to poke some drainage holes in the bottom to prevent water from getting trapped. Next, get creative with your decorations—paint them, add stickers, or even use fabric to cover them. Once decorated, fill them with soil and your favorite plants. Voila! You’ve got yourself a set of unique, upcycled planters.
Using Pallets and Crates
Wooden pallets and crates are fantastic for creating rustic, shabby-chic planters. They’re also great for adding a touch of character to any space.
- Materials: Find some wooden pallets or crates, sandpaper, paint or stain, and nails or screws.
- Steps: Disassemble the pallets if needed and sand them down to remove any rough spots. Then, assemble the wood into your desired planter shape. You can make a large planter box, a vertical garden, or even small individual pots. Finish by painting or staining the wood to match your decor. These planters are perfect for a rustic or farmhouse style and can be used indoors or on a covered patio.
Upcycling and recycling are not just about saving money—they’re about being creative and giving new life to things that might otherwise be thrown away. These projects are perfect for anyone who loves DIY with a touch of sustainability. So, dig through your cabinets, explore your garage, and see what you can turn into beautiful planters for your indoor garden!
Customizing and Personalizing Your Planters
Ready to add that extra special touch to your DIY planters? Customizing and personalizing your planters is a great way to make them truly one-of-a-kind and perfectly suited to your style. Whether you’re looking to add a splash of color, a quirky design, or a personalized label, this section will guide you through fun and easy ways to make your planters stand out.
Adding Decorative Elements
Let’s get creative with decorations! Adding unique details can turn a simple planter into a statement piece that catches everyone’s eye.
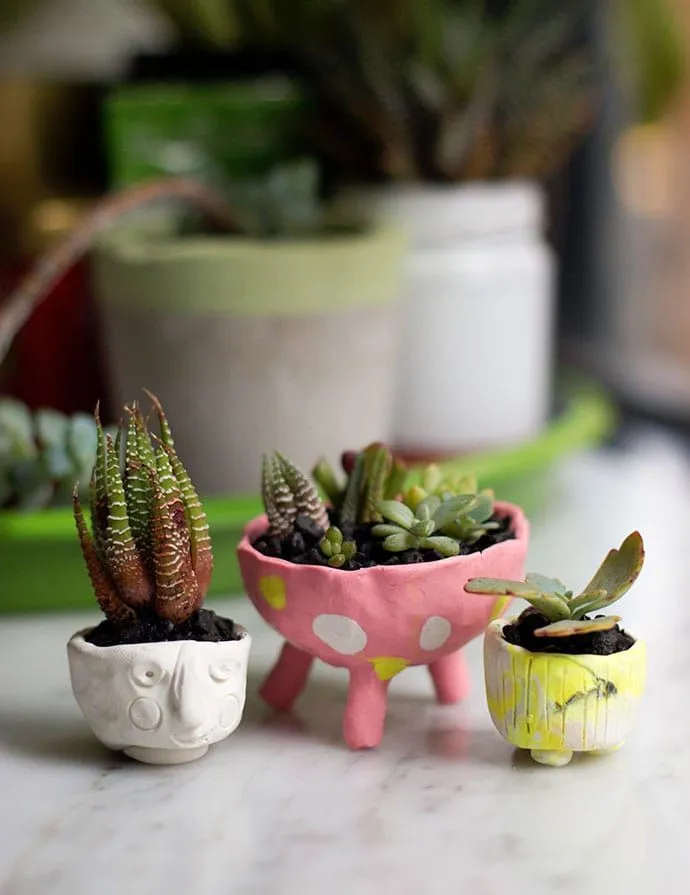
- Options: Think about using stencils, decals, mosaic tiles, or even beads. The possibilities are endless!
- Steps: Start by deciding on the decorative elements you want to use. For stencils, place them on your planter and use paint to create patterns or designs. Decals can be applied directly to your pot for a quick and easy update. If you’re into mosaics, glue tiles or pieces of broken china onto your planter for a colorful, textured look. Beads can be strung or glued onto the planter to add a touch of sparkle. Once you’ve added your decorations, seal everything with a clear spray or brush-on sealant to keep your design looking fresh.
Personalized Planter Labels
Adding personalized labels to your planters is not only practical but also adds a fun, custom touch. It’s a great way to keep track of what you’re growing and show off your creativity.
- Materials: Grab some chalkboard paint, labels, and markers.
- Steps: Apply chalkboard paint to a section of your planter or a separate label tag. Once dry, you can write the names of your plants, care instructions, or even little doodles. Chalkboard paint allows you to easily update the labels whenever you want to switch things up. For a more permanent solution, you can use waterproof markers or paint to create custom designs directly on your planters.
Customizing and personalizing your planters is all about adding your unique touch and making them reflect your style. It’s a fantastic way to make your indoor garden truly your own, and it’s easier than you might think. So, grab your decorating supplies, get inspired, and let your creativity shine!
Care and Maintenance of DIY Planters
Congratulations! You’ve created some fantastic DIY planters and your indoor garden is looking amazing. But just like any other part of your home, these planters need a bit of care and maintenance to keep them looking great and your plants thriving. Don’t worry, it’s not too complicated. Here’s everything you need to know to keep your DIY planters in top shape.
Cleaning and Maintenance Tips
Regular cleaning and a bit of upkeep go a long way in keeping your planters looking fresh and your plants healthy.
- Regular Cleaning Routines: Dust and grime can build up on your planters, especially if they’re on shelves or high up where they’re less likely to be noticed. Give them a gentle wipe down with a damp cloth every few weeks. For planters with intricate designs or those made from materials like concrete, you might need to use a soft brush or sponge to get into any crevices.
- Seasonal Care and Adjustments: As the seasons change, your plants’ needs and the condition of your planters might also change. In the winter, indoor air can be dry, so make sure your planters have adequate moisture. In the summer, check for any sun damage or fading, especially if your planters are painted or decorated.
Preventing Common Issues
Keeping your planters in good condition can help prevent common problems that can arise with DIY projects.
- Addressing Drainage Problems: Proper drainage is crucial for healthy plants. If your planters don’t have drainage holes, you might want to drill some or add a layer of gravel at the bottom to help water flow out. This helps prevent root rot and keeps your plants happy.
- Dealing with Mold and Pests: Mold can sometimes develop on planters, especially if they’re in a humid environment. To prevent this, make sure your planters are in a well-ventilated area and avoid overwatering your plants. For pests, check your planters regularly and use natural pest control methods if you spot any unwanted visitors.
Taking care of your DIY planters doesn’t have to be a hassle. With just a bit of regular maintenance and some simple precautions, you can keep your planters looking great and your plants thriving. So, keep an eye on your planters, give them a little love, and enjoy the beauty of your indoor garden!
Conclusion
Wow, you’ve made it to the end of our DIY planter journey! 🎉 By now, you’ve learned how to plan, create, and customize your own unique planters, turning your indoor garden into a showcase of creativity and style. Let’s wrap things up and recap why DIY planters are such a fantastic choice for adding personality and charm to your home.
Recap of Key Points
We started by exploring how to choose the right type of planter and materials for your space. Whether you went for a classic terracotta pot makeover, an upcycled plastic bottle planter, or an advanced concrete creation, each project has its own special touch. Customizing with paint, decorations, or personalized labels has given your planters that extra bit of flair that makes them truly yours.
Encouragement to Experiment
The best part about DIY planters is that there are no hard-and-fast rules. Feel free to experiment with different materials, designs, and techniques. Mix and match ideas, try new things, and let your creativity lead the way. Your indoor garden is your personal canvas, so don’t be afraid to make it as unique and vibrant as you are!
Additional Resources
If you’re itching for more inspiration or need a bit of guidance, there’s a whole world of resources out there. Check out online tutorials, join DIY and gardening communities, or visit blogs and videos for fresh ideas and expert tips. Your next great planter project is just around the corner!
Thanks for joining us on this DIY planter adventure. We hope you’ve found it fun and inspiring. Now go forth, get crafty, and enjoy the beautiful, personalized planters you’ve created for your indoor garden. Happy planting!


