Contents
Introduction
Hey there, plant lover! 🌿 Are your once-thriving apartment plants looking a little worse for wear? If your plants are drooping, turning yellow, or not growing like they used to, you might be dealing with root rot. Don’t worry—root rot is a common problem, and with the right steps, you can save your plant and get it back to its lush, green self.
Root rot is like a sneaky villain that attacks your plant’s roots, usually caused by too much water or poor drainage. When roots sit in soggy soil, they can start to decay, leading to all sorts of problems up top, like wilting leaves and stunted growth. It’s a bit like when you leave your sneakers out in the rain—they get all soggy and start to smell. Gross, right? Your plant’s roots don’t like that either.
But don’t panic! Fixing root rot is totally doable, and with a little know-how, you can nurse your plant back to health. In this guide, we’ll walk you through everything you need to know—from spotting the early signs of root rot to taking action and preventing it in the future. Whether you’re a seasoned plant enthusiast or a newbie green thumb, these simple steps will help you get your plant back on track.
Ready to save your plant and bring it back to its vibrant, healthy self? Let’s dive in and tackle that root rot together!
Understanding Root Rot
So, what exactly is root rot, and why should you be concerned about it? Let’s break it down in simple terms. Root rot is a sneaky problem that affects the roots of your plants, causing them to decay and turn mushy. This happens when the roots are sitting in soil that’s too wet for too long—kind of like letting your sneakers stay wet after a rainstorm. Over time, this excess moisture creates the perfect breeding ground for harmful fungi and bacteria.

What Causes Root Rot?
Root rot usually starts with overwatering. When you water your plant too much or if the soil doesn’t drain well, it becomes a soggy mess. This wet environment is exactly what those nasty fungi and bacteria love. They begin to attack the roots, leading to rot. Poor drainage in your plant pot can also contribute to this issue. If water can’t escape, it’ll just sit there and cause problems.
How Can You Tell if Your Plant Has Root Rot?
It’s not always easy to spot, but here are some telltale signs that your plant might be suffering from root rot:
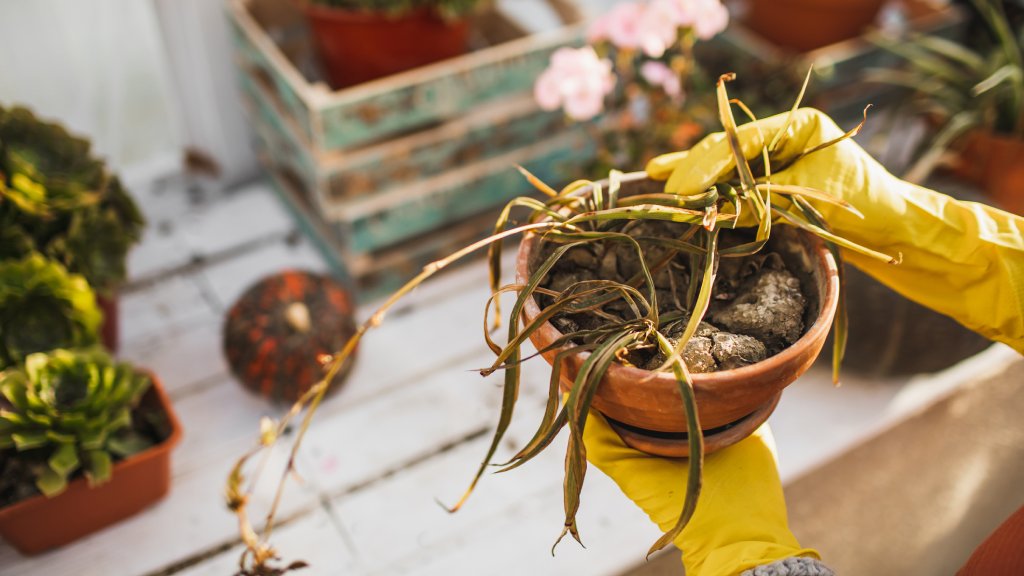
- Yellowing Leaves: If your plant’s leaves are turning yellow and looking droopy, it could be a sign of root rot.
- Wilting Despite Watering: Even if you’re watering regularly, your plant might still look wilted if the roots are damaged.
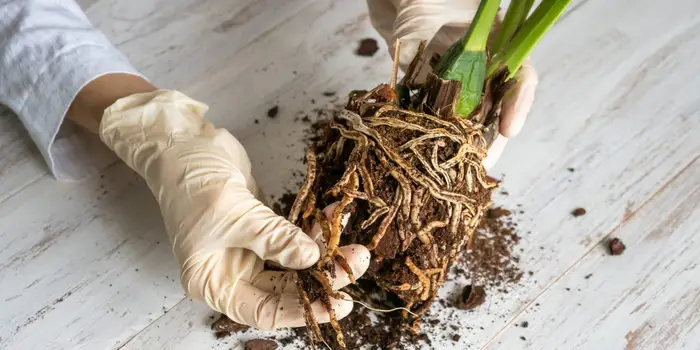
- Mushy Roots: If you gently pull your plant out of its pot and the roots feel soft, mushy, or look dark and slimy, that’s a clear sign of rot.
- Foul Smell: A rotten smell coming from the soil or plant base is another red flag.
Understanding root rot and its causes is the first step toward fixing it. Don’t worry if you spot these symptoms—root rot is common, and with the right care, you can turn things around and get your plant back to its happy, healthy self.
Diagnosis of Root Rot
Alright, so you suspect your plant might be suffering from root rot—now what? Diagnosing root rot is like being a plant detective. You need to carefully check a few things to figure out if this is the problem and how severe it might be. Let’s go through the process step-by-step.

Inspecting the Plant
First things first, take a close look at your plant. Here’s what to do:
- Visual Inspection: Check out the leaves and stems. Are they turning yellow or looking limp? These can be signs that something’s off. Also, give the soil a quick look. Is it constantly soggy or just not drying out as it should? That’s another clue.
- Soil Check: Stick your finger about an inch into the soil. If it feels wet and doesn’t dry out quickly, your plant might be sitting in too much water. Dry soil usually means it’s not the problem, but very wet soil is a big red flag.
Testing for Root Rot
Next, you’ll need to get a bit hands-on:

- Removing the Plant: Gently take the plant out of its pot. Don’t rush this step—try to keep the root ball intact. This will help you examine the roots without causing more damage.
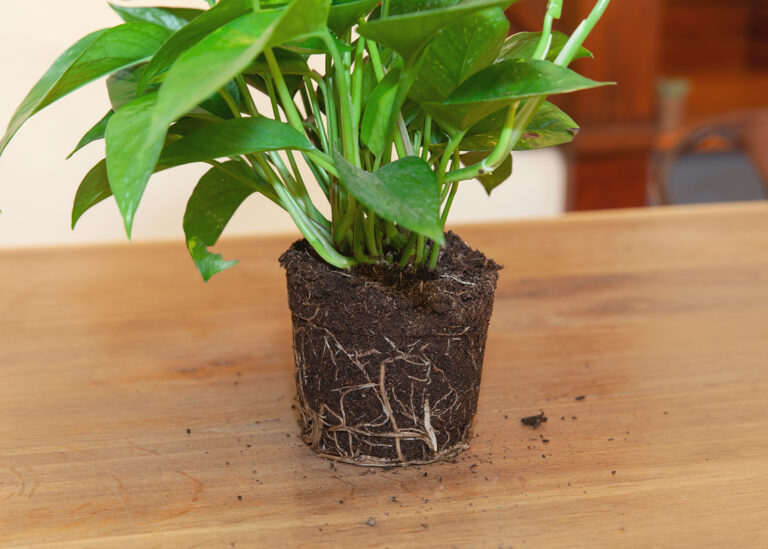
- Root Examination: Look at the roots closely. Healthy roots are usually white or light tan and firm. If they’re dark, mushy, or have a slimy texture, they’re likely rotting. Healthy roots should be firm and resilient, not soft and mushy.
Tools and Supplies Needed
Here’s what you’ll need to properly diagnose and treat root rot:
- Gardening Gloves: To keep your hands clean and protected.
- Pruning Shears or Scissors: For trimming away any rotten roots.
- Fresh Potting Mix: To replant your plant once you’ve treated it.
- Pot with Good Drainage: Ensure your new pot has drainage holes to prevent future problems.
Diagnosing root rot involves a bit of detective work, but don’t worry! Once you’ve identified the issue, you’ll be ready to take the next steps to help your plant recover. Keep calm, check your plant thoroughly, and you’ll be on your way to fixing the problem.
Steps to Fix Root Rot
Got your detective hat on and diagnosed root rot? Great! Now it’s time to roll up your sleeves and get to work saving your plant. Fixing root rot involves a few key steps to clean up the mess, replant your green friend, and help it bounce back. Let’s break it down step by step.
Removing the Affected Plant
- Gently Removing the Plant: Carefully take your plant out of its pot. Be gentle to avoid damaging the roots further. Hold the base of the plant and gently pull it out. If it’s stuck, tap the sides of the pot to loosen it up.
- Cleaning the Pot: Once the plant is out, it’s important to clean the pot. Wash it thoroughly with soap and water to get rid of any leftover fungus or bacteria. If you want to be extra cautious, you can even soak it in a mixture of water and bleach for a few minutes, then rinse well and let it dry.
Pruning the Roots
- Identifying and Cutting Rotten Roots: Look at the roots you’ve just uncovered. Trim away any roots that are black, brown, mushy, or slimy. Use clean, sharp scissors or pruning shears to make precise cuts. Healthy roots should be firm and white or light tan.
- Tools and Techniques: Make sure your tools are clean to avoid spreading any infections. Cut only the affected parts and try to leave as much healthy root as possible. This will help your plant recover faster.
Repotting the Plant
- Choosing the Right Potting Mix: Pick a potting mix that drains well. A mix designed for houseplants or one with added perlite or sand will help ensure excess water doesn’t get trapped. Avoid using garden soil, as it often retains too much moisture.
- Pot Selection: If your old pot doesn’t have drainage holes, it’s time for a new one. A pot with good drainage is crucial to prevent root rot from coming back. Choose a pot that’s just a bit larger than the old one to give your plant room to grow.
- Repotting Procedure: Place a layer of fresh potting mix at the bottom of the new pot. Position your plant in the center and gently spread out the roots. Add more potting mix around the plant, pressing it down lightly to eliminate air pockets. Water the plant thoroughly but don’t overdo it. Just make sure the soil is evenly moist.
And there you have it! By carefully removing your plant, trimming away rotten roots, and repotting it in fresh soil, you’re setting the stage for a healthy recovery. With a little TLC, your plant will be back to its vibrant self in no time!
Preventing Future Root Rot
Awesome, you’ve fixed the root rot and your plant is on the mend! But why stop there? Let’s make sure it doesn’t happen again. Preventing future root rot is all about creating the best environment for your plant and avoiding the common pitfalls that lead to rot. Here’s how you can keep your plant happy and healthy:
Watering Practices
- Understanding Watering Needs: Different plants have different watering needs, so it’s important to know what your specific plant prefers. Most plants like their soil to dry out a bit between waterings. A good rule of thumb is to check the top inch of soil. If it’s dry, it’s time to water. If it’s still moist, wait a bit longer.
- Signs of Overwatering: Watch out for symptoms of overwatering like yellowing leaves, soggy soil, and a musty smell. If you notice these signs, cut back on watering and let the soil dry out more before giving your plant another drink.
Improving Drainage
- Potting Mix: Use a well-draining potting mix to keep water from sitting around the roots. Look for mixes that contain perlite, sand, or vermiculite, which help with drainage. Avoid using garden soil, as it tends to retain too much moisture.
- Potting Techniques: Make sure your pot has drainage holes at the bottom. These holes allow excess water to escape, preventing water from pooling and causing root rot. If your pot doesn’t have drainage holes, consider switching to one that does.
Environmental Factors
- Light and Temperature: Your plant’s light and temperature needs play a big role in its health. Most houseplants prefer bright, indirect light. Keep your plant away from drafts, heaters, or air conditioners, as extreme temperatures can stress the plant and make it more susceptible to diseases.
- Humidity Levels: Some plants thrive in higher humidity, while others prefer drier conditions. If you have a plant that loves humidity, you can increase it by misting the plant or placing it on a humidity tray. For plants that prefer lower humidity, make sure not to overwater and keep the room well-ventilated.
By following these tips, you’ll create a healthier environment for your plant and reduce the risk of root rot happening again. With proper watering, good drainage, and the right environmental conditions, your plant will stay happy and vibrant!
When to Seek Professional Help
You’ve done your best to tackle root rot, but what if your plant isn’t bouncing back the way you hoped? Sometimes, even with all the right steps, a plant might need a bit of extra help. That’s when it’s time to consider reaching out to a plant professional. Let’s talk about when and why you might need to get expert advice.
Persistent Problems
- Consulting a Plant Specialist: If you’ve followed all the steps to fix root rot and your plant still isn’t improving, it might be time to consult a plant specialist. These experts can provide insights that go beyond basic care tips. They might be able to identify underlying issues you may have missed or suggest advanced treatments to save your plant.
- When to Seek Help: If you’ve tried different approaches, but your plant is still showing signs of stress, or if you’re dealing with a particularly valuable or cherished plant, getting professional advice can be worth it. A plant specialist can offer personalized guidance tailored to your plant’s specific needs.
Signs of Severe Damage
- Recovery Prospects: In some cases, root rot can be severe enough that the plant may not recover fully, despite your best efforts. If you notice that the plant’s condition is worsening and it has lost most of its healthy roots, it might be time to evaluate whether it’s worth continuing treatment or if it’s better to focus on other plants.
- Signs to Watch For: If the plant’s overall health continues to decline, even after repotting and adjusting care practices, or if the rot has spread extensively, these are indicators that the plant might be beyond saving.
Sometimes, professional help can make all the difference in rescuing your plant or understanding when it’s time to let go. Don’t be afraid to ask for advice—it’s all part of being a dedicated plant parent. With the right support, you can either bring your plant back to health or make informed decisions about its future.
Conclusion
Congratulations, you’ve made it through the process of diagnosing and treating root rot! 🌟 With the right steps and a bit of patience, you’ve given your plant a new lease on life. Let’s recap what you’ve learned and why it’s important to keep up with your plant care routine.
Summary of Key Points
You started by identifying the signs of root rot, like yellowing leaves and mushy roots. From there, you carefully removed the plant, trimmed away the rotten roots, and repotted it in fresh, well-draining soil. You also learned how to prevent future root rot by adjusting your watering practices, improving drainage, and creating the right environmental conditions for your plant.
Encouragement to Take Action
Remember, keeping your plant healthy is an ongoing process. Regularly check your plant’s soil moisture, make sure it has proper drainage, and keep an eye on its overall health. By staying proactive and attentive, you can prevent root rot from making a comeback and ensure your plant stays vibrant and happy.
You’ve got this! With your newfound knowledge, you’re well-equipped to handle root rot and other plant care challenges. Your plant is lucky to have such a dedicated caretaker. Keep up the great work, and enjoy watching your plant thrive!


